DIY Bar Cabinet Plans with Mini-Fridge & Sliding Doors
This post may contain affiliate links. Read my full disclosure here.
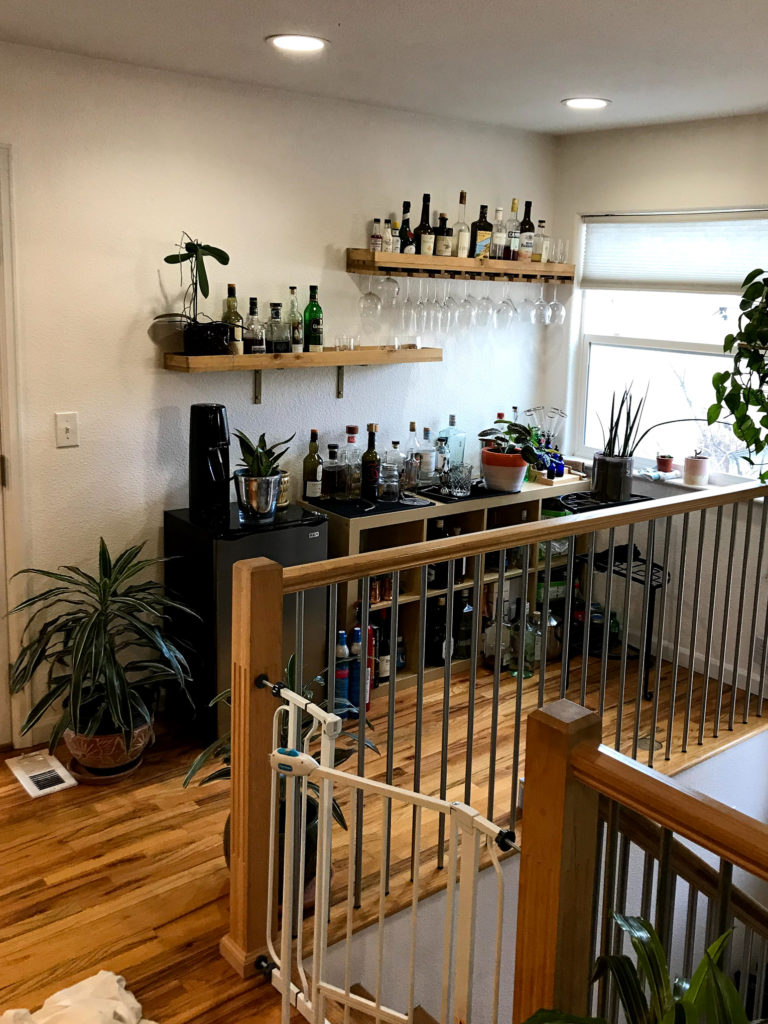
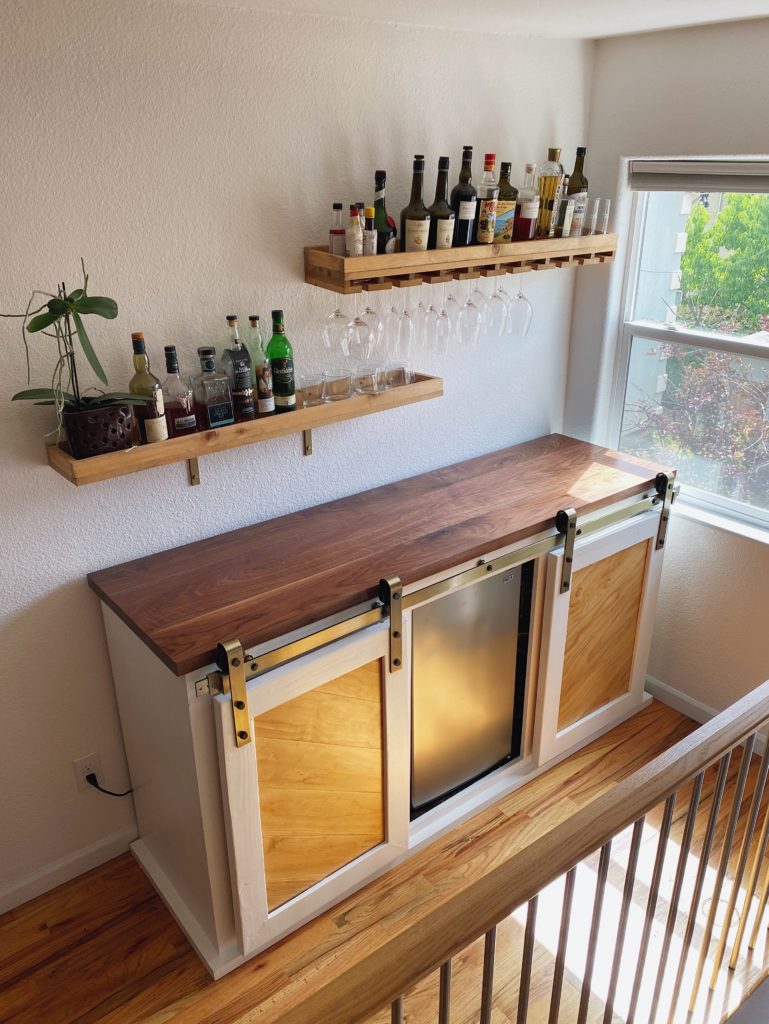
My husband, Colin, is a cocktail connoisseur who enjoys making his own tinctures and bitters. Our Ikea cube shelf unit was starting to overflow with mason jars and liters of liquor (maybe even a few plants) and I was on the hunt for a bar cabinet that could store it all along with our mini-fridge. My search took me to Etsy and I found one — but it still wasn’t what I wanted plus it cost $3,000. I decided to make my own!
Cost
Since this was my first project, I didn’t have a lot on hand to start with. I had some help at the beginning and found local business to outsource help later when needed. I also decided at some point along the way that this was something I wanted to do more of, so it made sense to make the investment in some tools along the way.
All in all, I spent $2,350 on this cabinet – but you’ll spend less if you already have the tools. Here’s the breakdown:
$1,050 – materials including lumber, walnut bar top ($460), and barn door hardware ($200)
$300 – paint, stain, and supplies
$600 – outsourced help like planing, edging, and joining the bar top, routing the barn doors, and shortening the length of the barn door rail
$400 – acquiring tools like a kreg jig, miter saw, and table saw
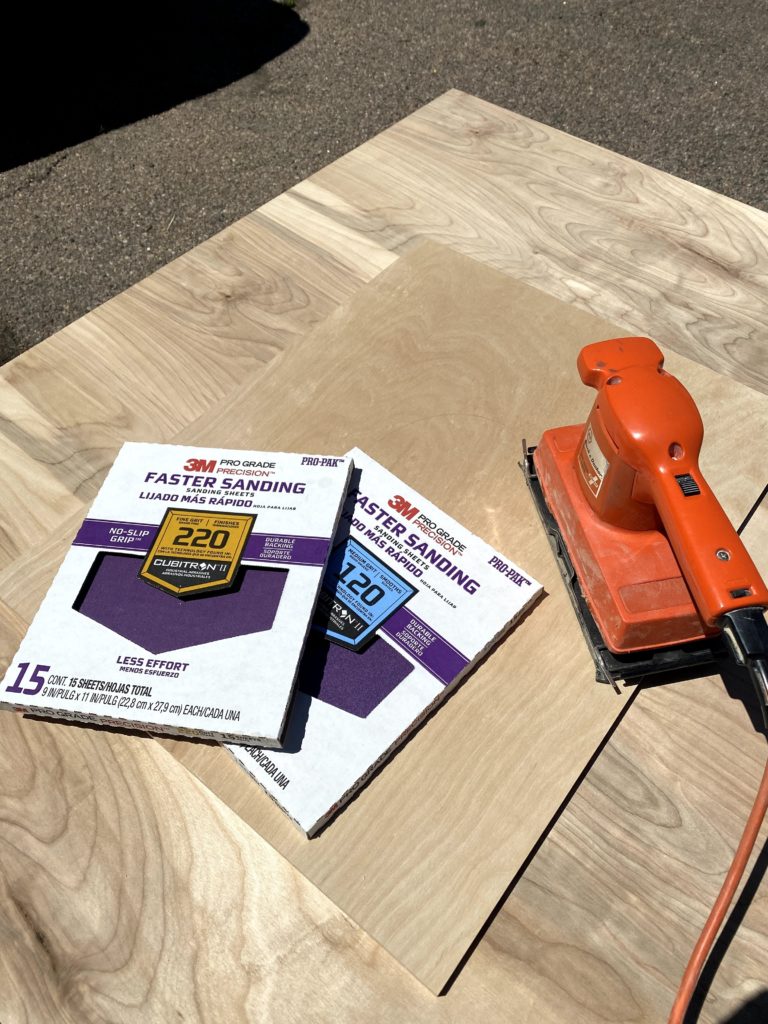
Step 1: Sand faces that will be painted or stained
Sanding is a must if you’re going for a smooth finished product. It helps even out the surface by removing any rough patches, as well as preparing the surface to adhere better to the paint or stain you’ll be using later.
I prefer to knock this part out at the very beginning while they’re separate pieces rather than during or after the install to help eliminate dust in my working area and avoid sanding any crevices that have been joined together. Consider whether or not that section will be exposed and need to be painted or stained.
Use 120-grit first.
Follow up with 220-grit after.
For my cabinet, I painted the outside Dixie Belle Chalk Mineral Paint in Cotton and stained the interior with Minwax’s “Dark Walnut”. I also stained everything after I finished sanding and before putting it all together.
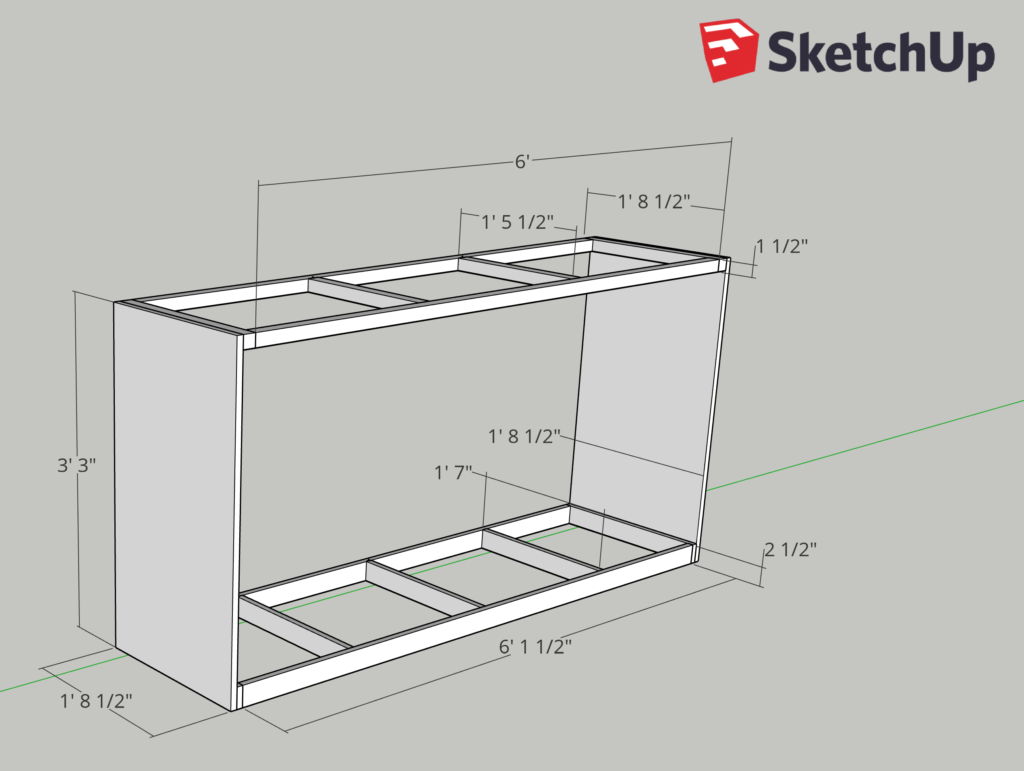
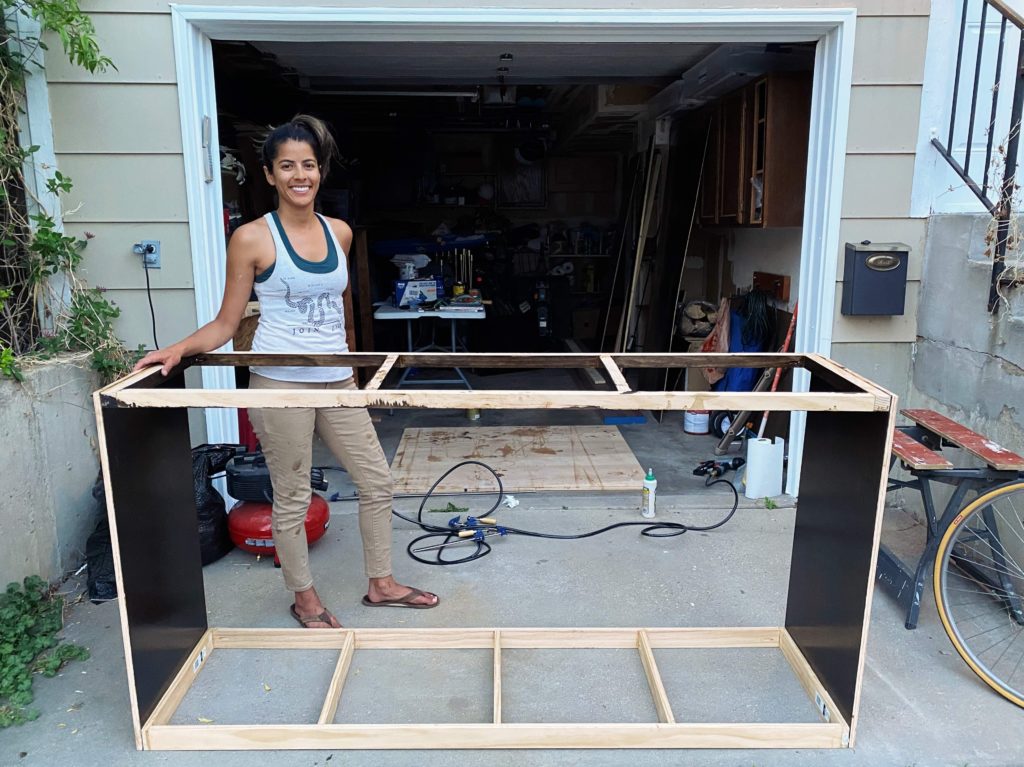
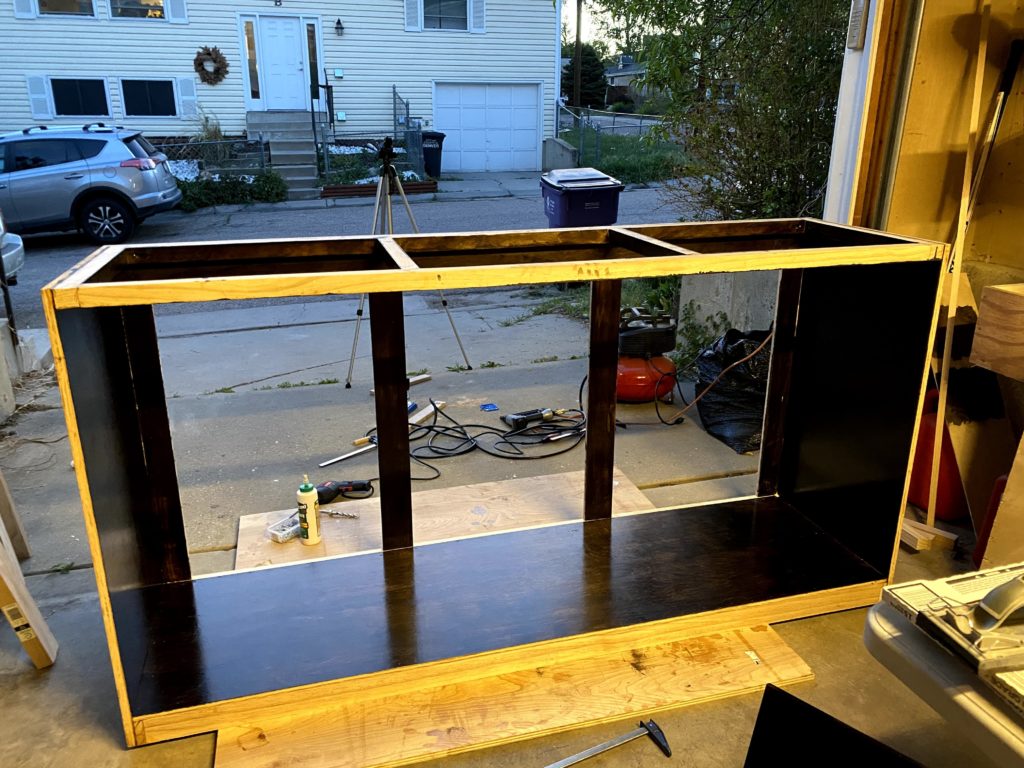
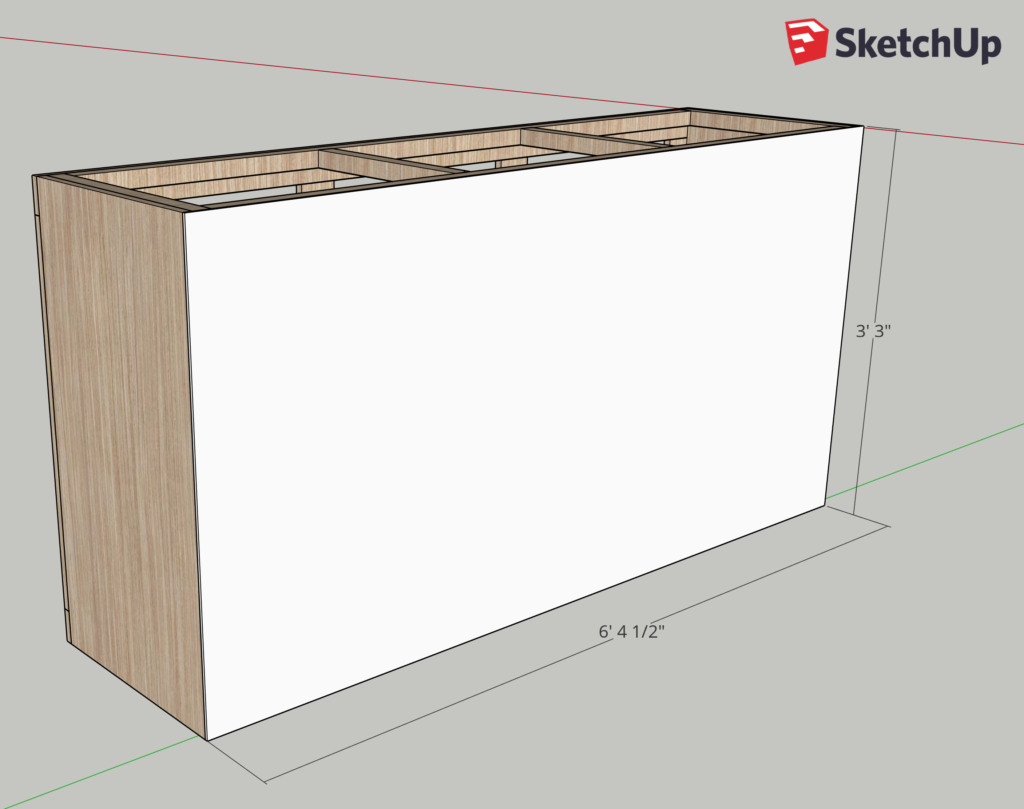
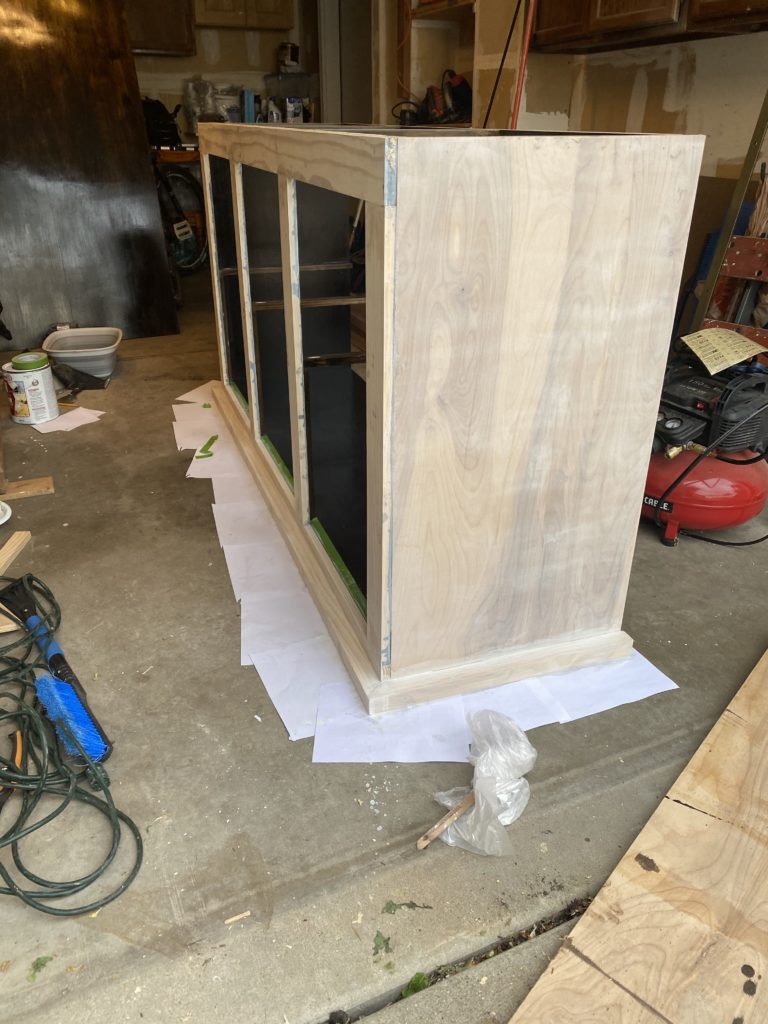
Step 2: Build the frame
Start by assembling the top and bottom frames. The top are 2×2’s and bottom are 1×3’s. I used wood glue and pocket holes to connect all joints together. Be sure to keep your speed square handy to make sure the frame is square throughout the entire process.
Once the frames are in place, secure the 3/4″ plywood sides with wood glue and nail gun.
I opted to stain the pieces before assembly so I didn’t have to crouch down or worry about stain dripping onto anything else.
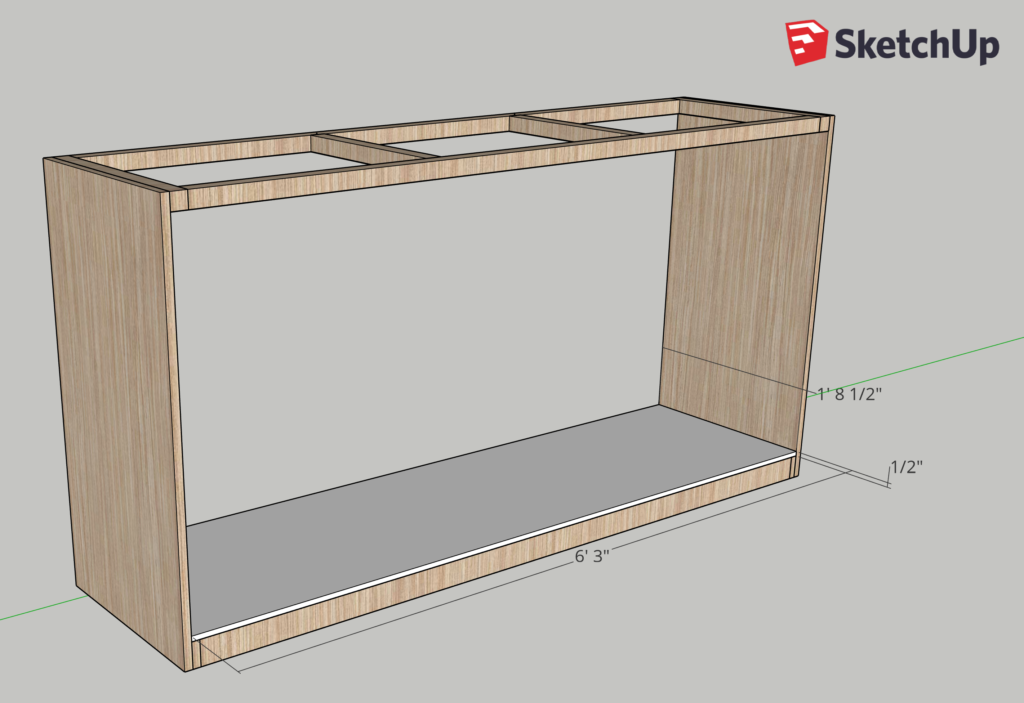
Step 3: Add bottom shelf
Insert bottom shelf (1/2″ plywood) and use the nail gun and wood glue to secure in place.
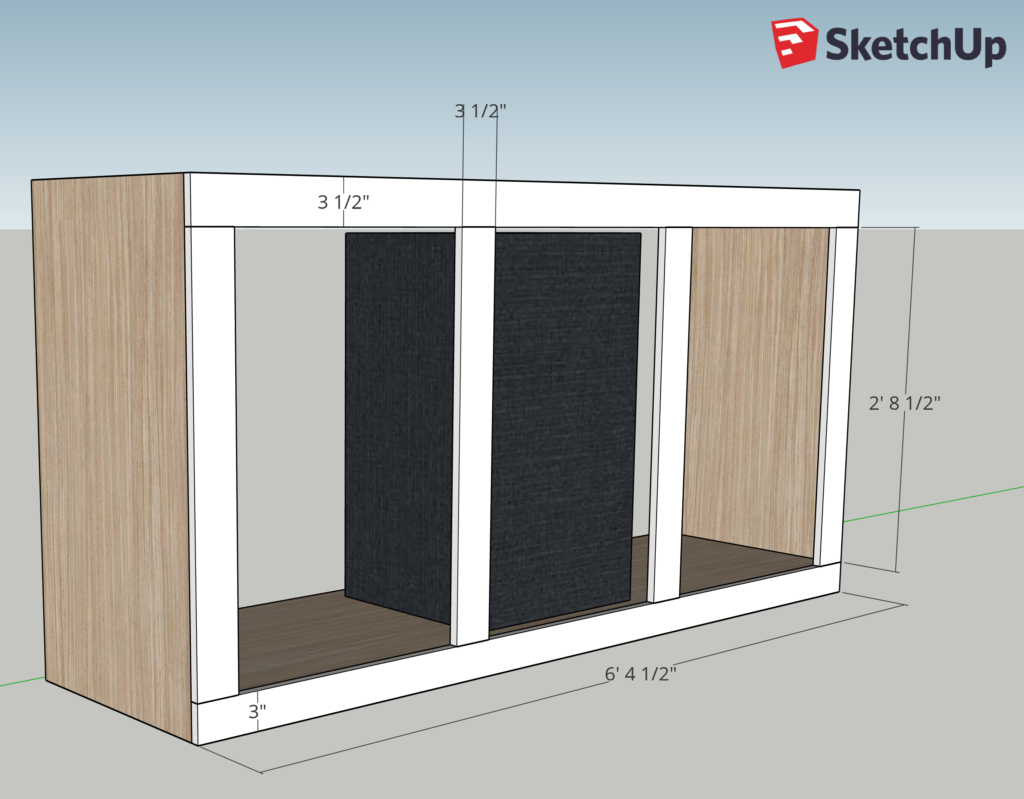
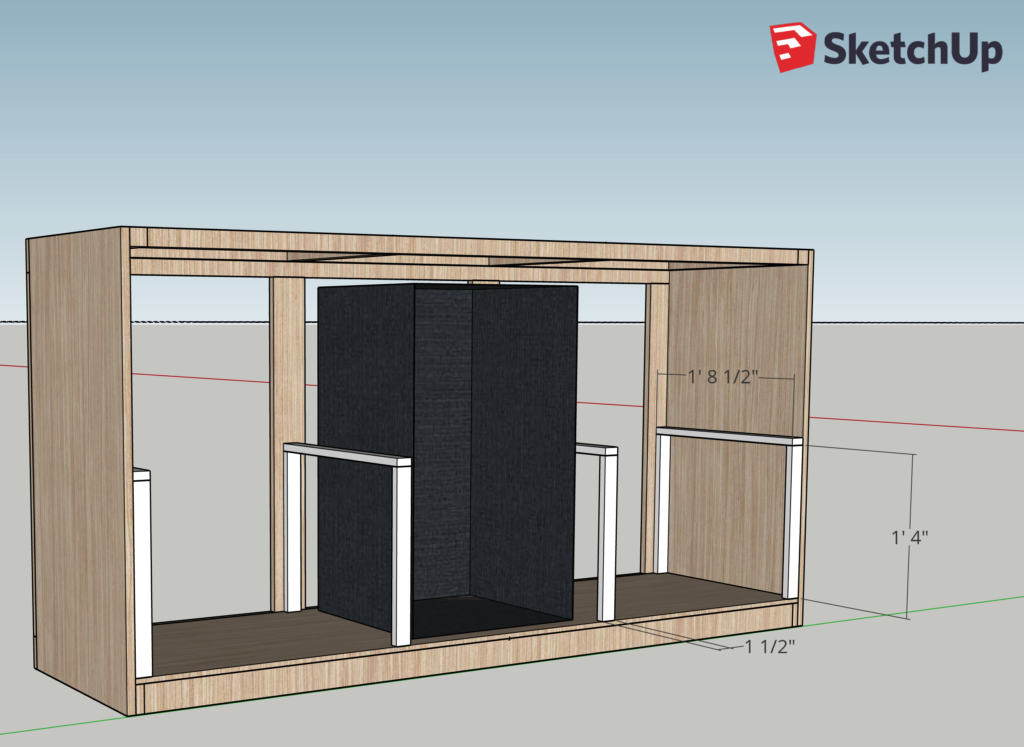
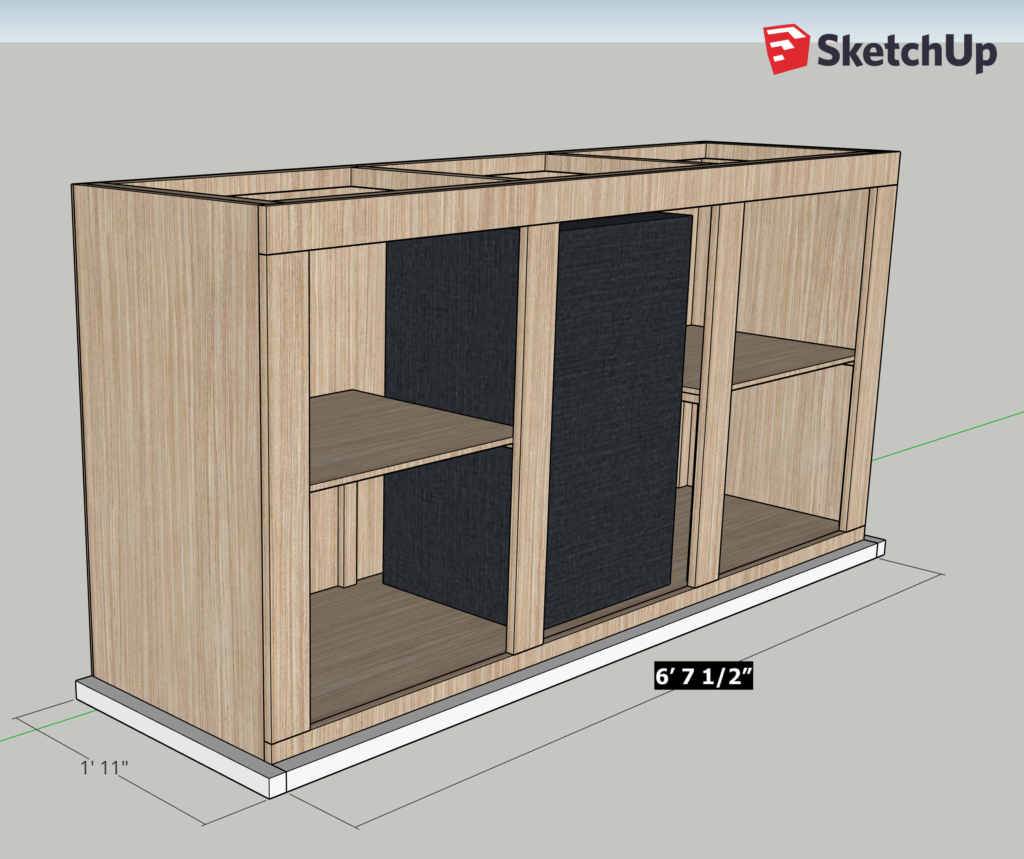
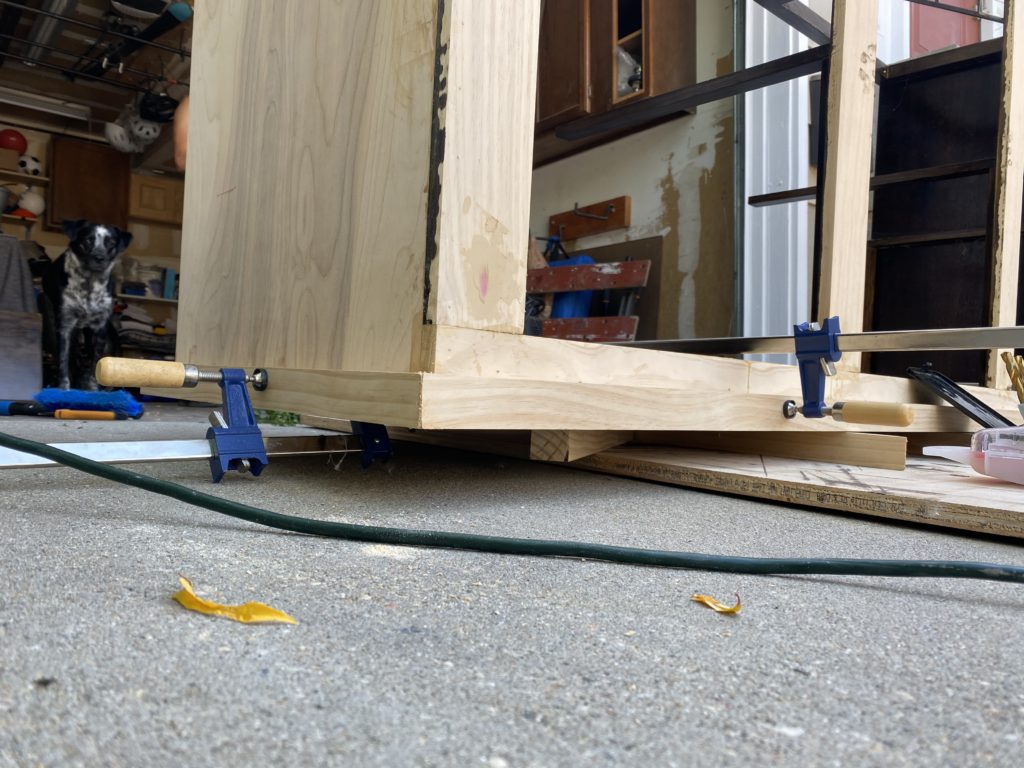
Step 4: Install face frame
The face frame uses 1×4’s but it’s important that the bottom piece is cut to a true 3″ height so it’s flush with the bottom of the shelf. Secure the bottom piece in place first using wood glue and nails. I found it easiest to lay the cabinet on the back of the frame and used clamps to ensure the frame was flush while the glue dried.
Next, create pocket holes at the top and bottom on each of the four middle supports. You’ll start by securing them to the bottom face frame using kreg jig wood screws and wood glue. I started with the far right and left supports first making sure they were flush with the side of the cabinet. You can always nail them into the frame for good measure, too.
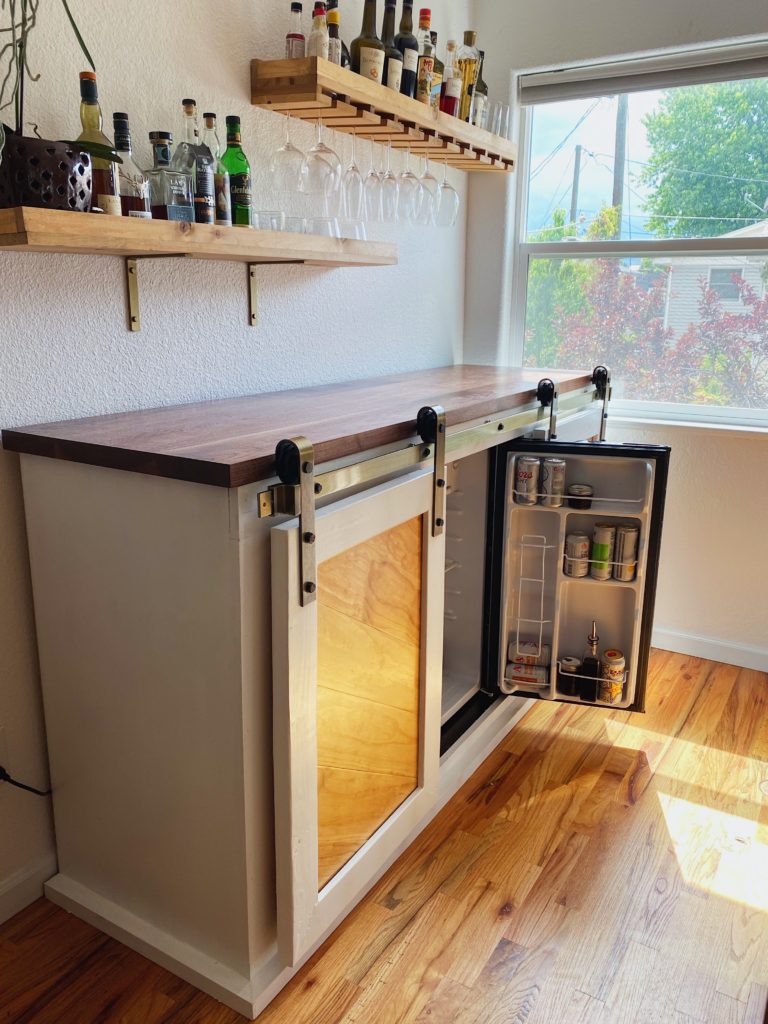
For middle support spacing, I accounted for the width of my mini-fridge in the center including an extra inch or so on each side.Middle spacing: 20.25″, right and left: 21.125″. I used a scrap piece of wood the width of my mini-fridge triple check it was wide enough to get the fridge in and out.
Now you’re ready to attach the top frame using wood glue, pocket holes from the middle support pieces, and nailing it into the frame with the nail gun.
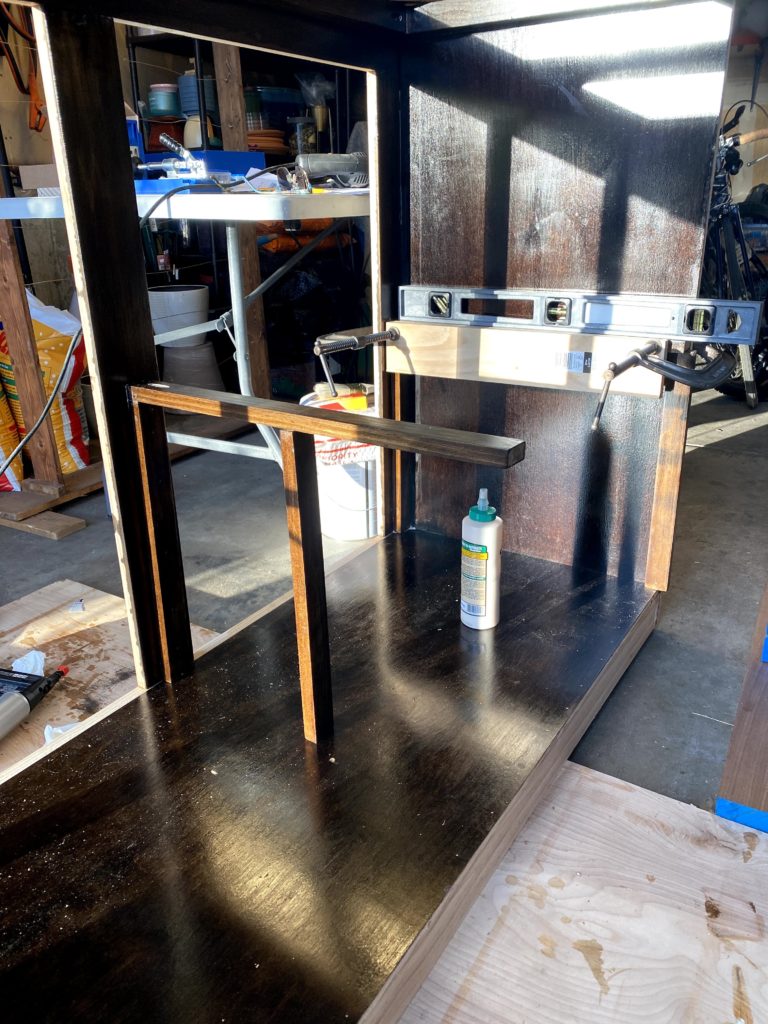
Step 5: Install shelf supports
For the shelf supports using 1x2s, secure them into the bottom shelf using pocket holes and glueing them to the back of the face frame. Clamps are helpful here to hold in them in place while the glue dries.
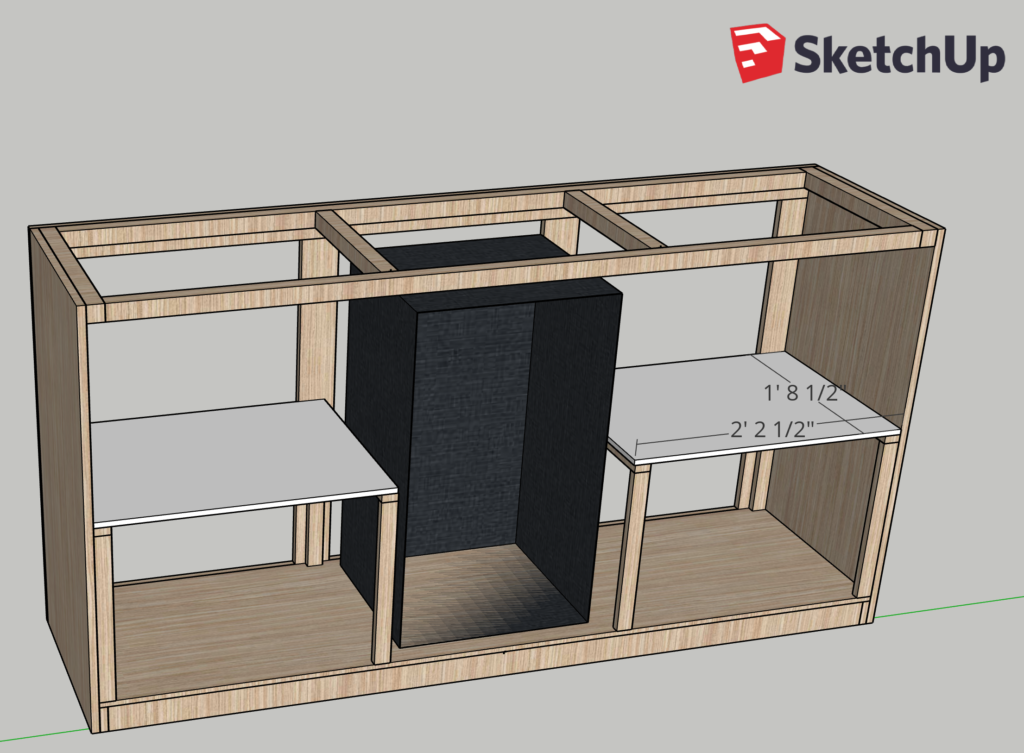
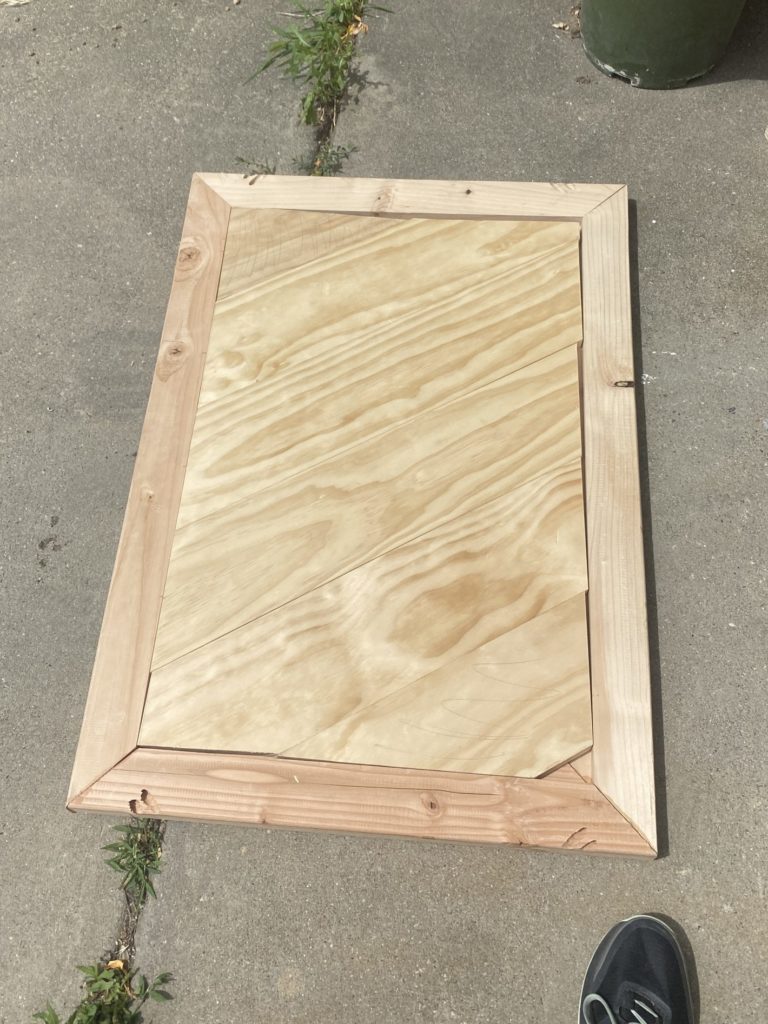
Step 6: Add shelves
It’s time to add the 1/2″ plywood shelves! For a finished look, apply veneer edging to the front facing shelf before you stain or paint to cover up the layers of plywood. Simply iron it on, cut off the length you need, and use a trim tool or razor to make sure the width is fit to the shelf as well. The image below shows an example of a regular piece of plywood (top) and a piece of plywood with the edging on it (bottom)!
Step 7: Nail on the back
Grab your nail gun and secure the back of the cabinet (1/4″ plywood) to the frame. Wood glue is good to use here along with clamps to hold in place while the glue dries and ensure the back is flush with the frame.
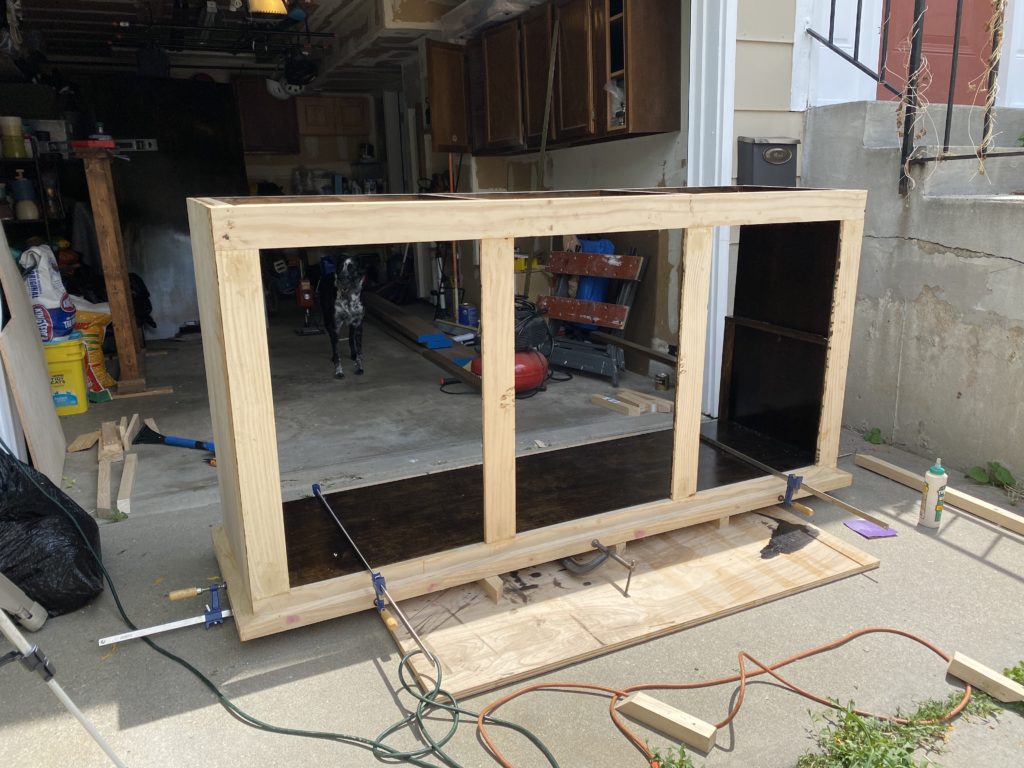
Step 8: Add bottom trim
The 2×2’s will be your bottom trim. Nail them in as pictured above or you can cut with 45 degree miters at the corners. I went with mitered corners. I also used scraps to lift the cabinet off the ground so I could use my clamps to hold the trim in place while the glue dried.
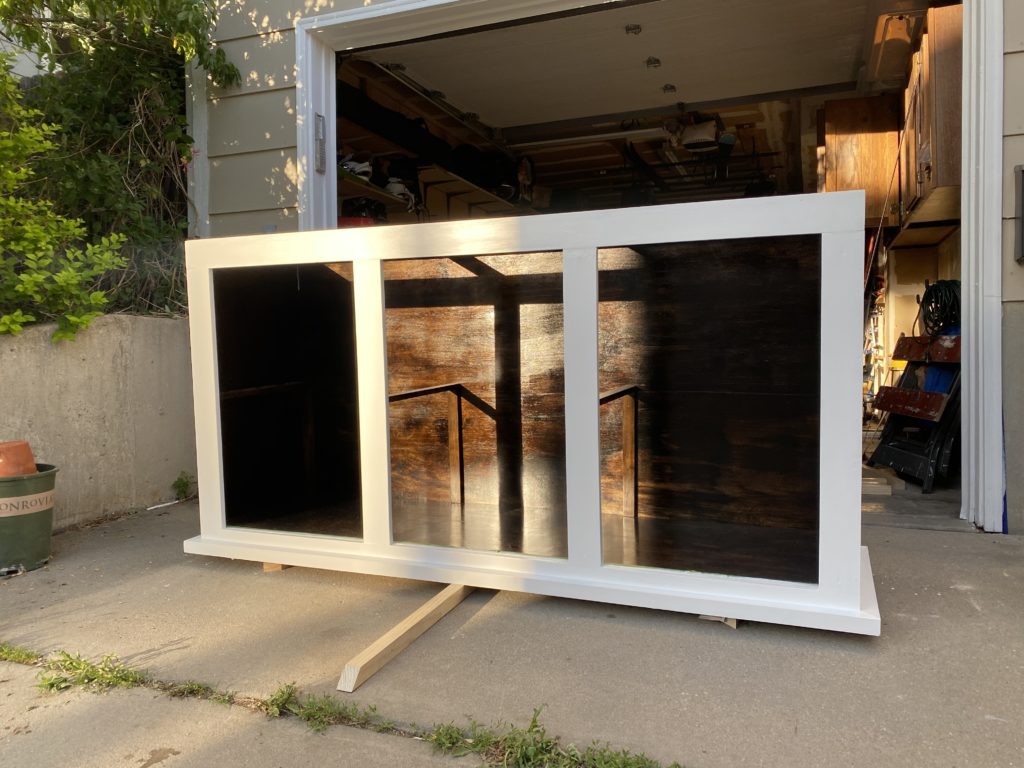
Step 9: Prime, paint, and seal cabinet exterior
Prime
Priming’s not necessary every time you paint furniture but I knew I wanted a true bright white exterior. In order to hide the natural undertones from the wood, I had to prime. I applied 3 coats of B-I-N shellac primer. I let it completely dry between coats and lightly sanded with 220-grit before each coat.
Paint
If you’re going with chalk paint…
Use a soft synthetic brush, lightly dampen it before you start painting
Keep your brush strokes long and even, going in the same direction with the wood grain
Let it completely dry between coats, I applied 3 coats of chalk paint total
Lightly sand with 220-grit or higher
Seal
Using a foam brush, mix a little of the chalk paint with the sealer for the first coat. Something like 15/85 paint to sealer. I used General Finishes for the sealer.
The second and third coats are 100% sealer
Use long, thin brush strokes
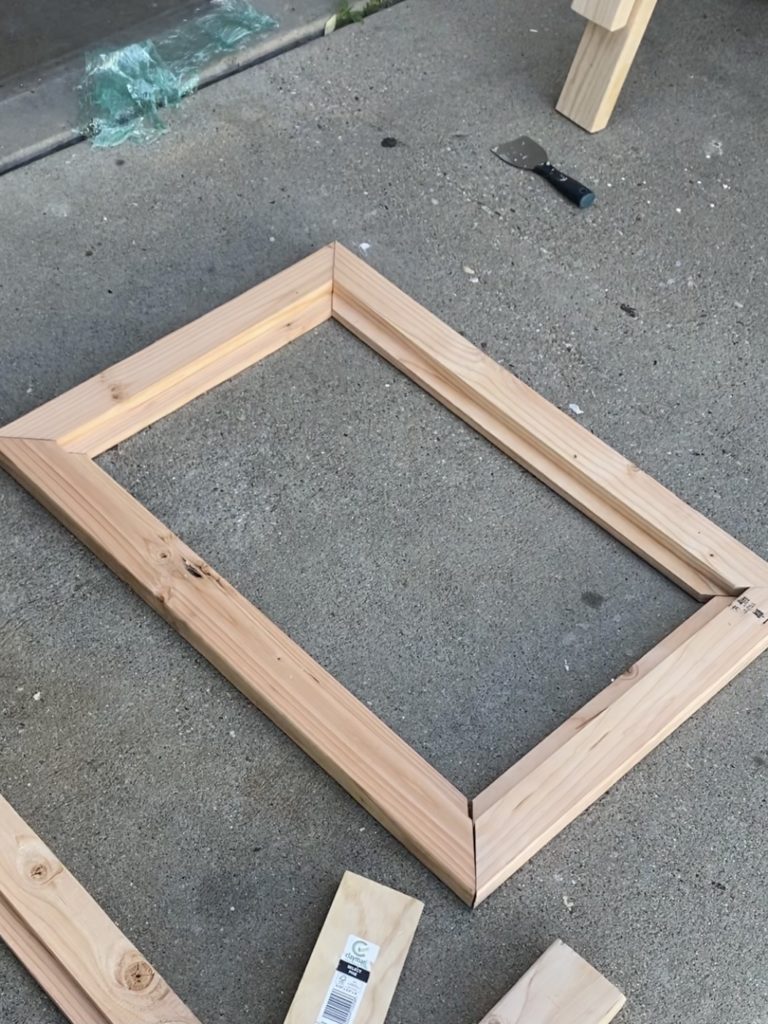
Step 10: Assemble door frames
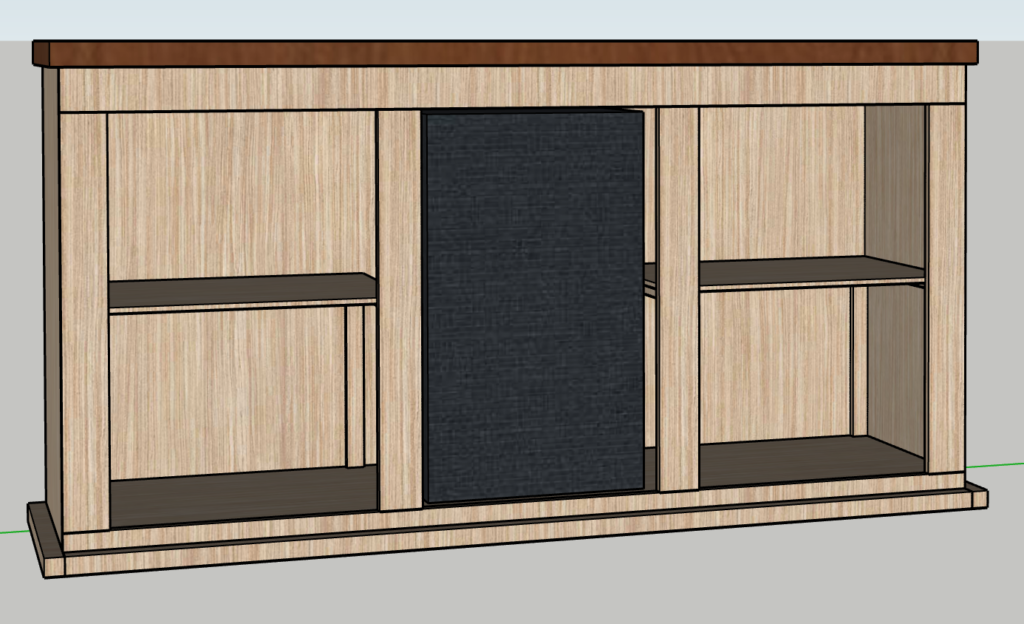
I didn’t use Sketchup for the doors, so these are not included in the lumber needed or cuts.
For my door panels, I used 1×4 select pine. The guys at Where Wood Meets Steel helped router the inner edges at 3/4″ for where I’d later place the panels. I joined the frame together with pocket holes.
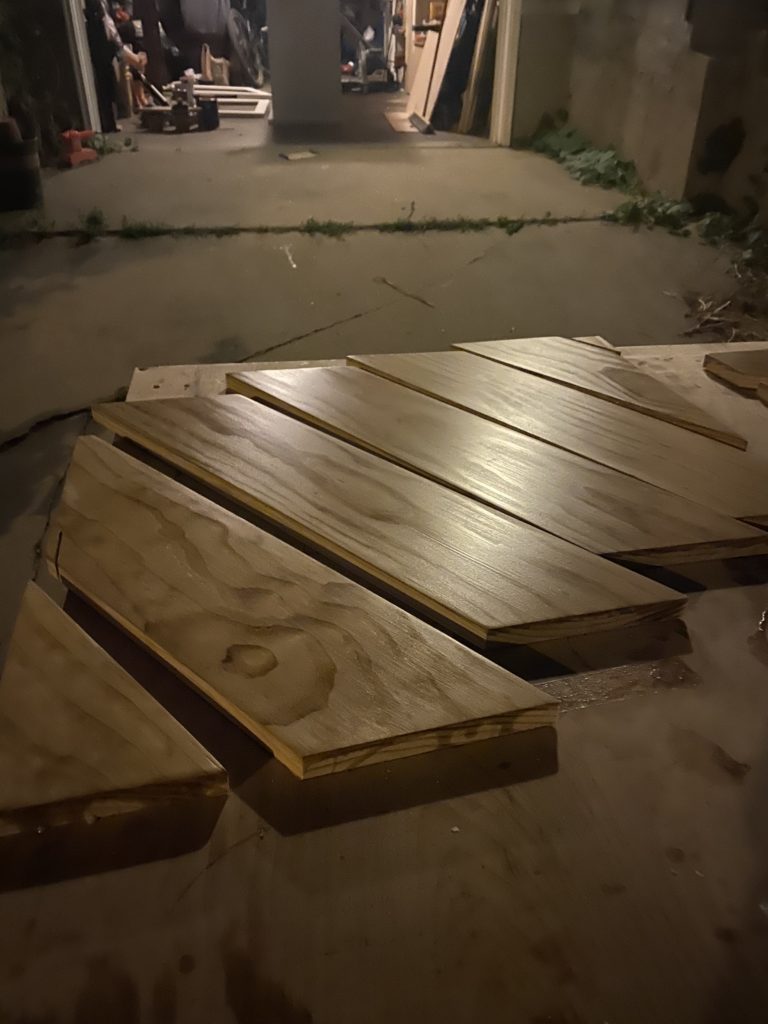
Step 11: Stain & install door panels
Using 1×6 select pine boards, I cut the panels with my miter saw. Once fitted, I sanded and then mixed Minwax Wood Ipswich pine and golden oak stains together to achieve the look I wanted.
The door frames were painted with the same chalk paint as the rest of the cabinet.
Step 12: Install barn door hardware to cabinet & attach doors
The barn door hardware came with its own instructions. I made sure the door frames were at the appropriate height where they could slide freely without scraping the bottom trim.
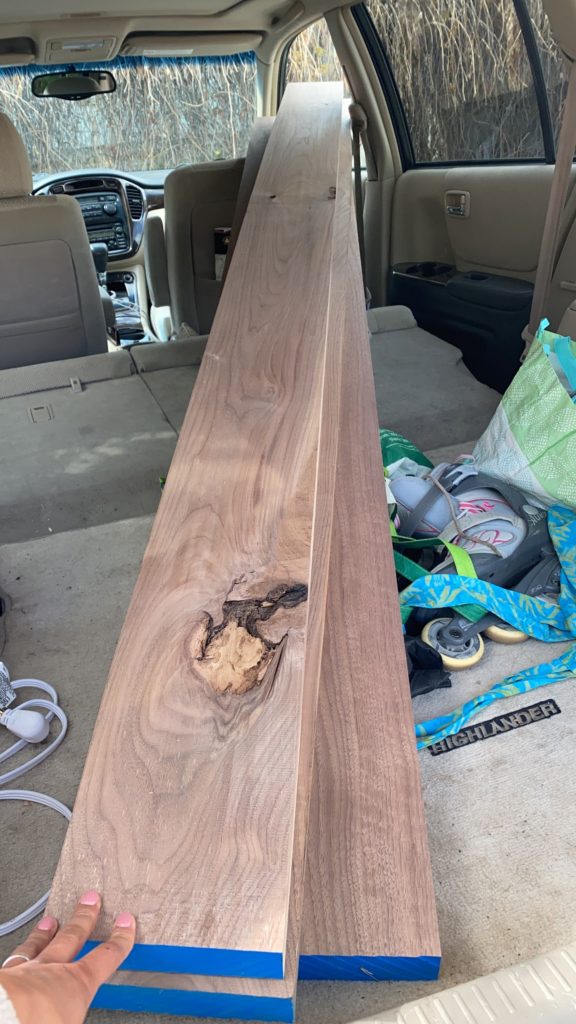
Step 13: Plane, edge, and join bar top
I pulled boards of walnut from Austin Hardwoods. When you purchase from them, they plane and edge 2 of the 4 sides. I needed it all to be planed and edged. Once again, the crew at at Where Wood Meets Steel planed and edged the remaining sides and I also asked them to join them together to make one, solid piece for the bar top. You could also use a special ripping blade to edge the sides, join together with pocket holes, and glue it on your own, but I really wanted this piece to be professionally done.
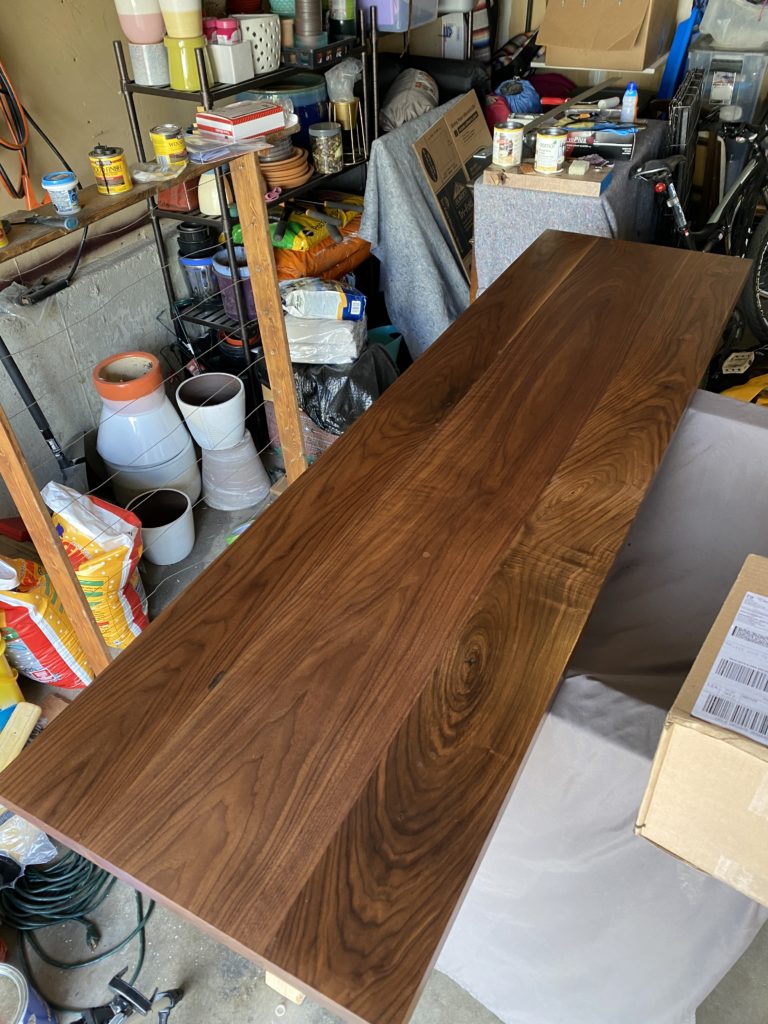
Step 14: Sand and stain bar top
Sand with the 120-grit, then 220 to the top, bottom and all four sides. Even though you won’t see the bottom, it still needs to be stained and finished. Wipe it down thoroughly with the tack cloth before staining.
I first considered epoxy to protect the wood from drink spills, but the walnut was just too beautiful to hide. I decided to use Osmo Polyx-Oil instead. It’s light but still protects the piece from water, beer, and wine while highlighting the wood’s natural color.
Watch this and/or this YouTube videos to see how it’s best applied.
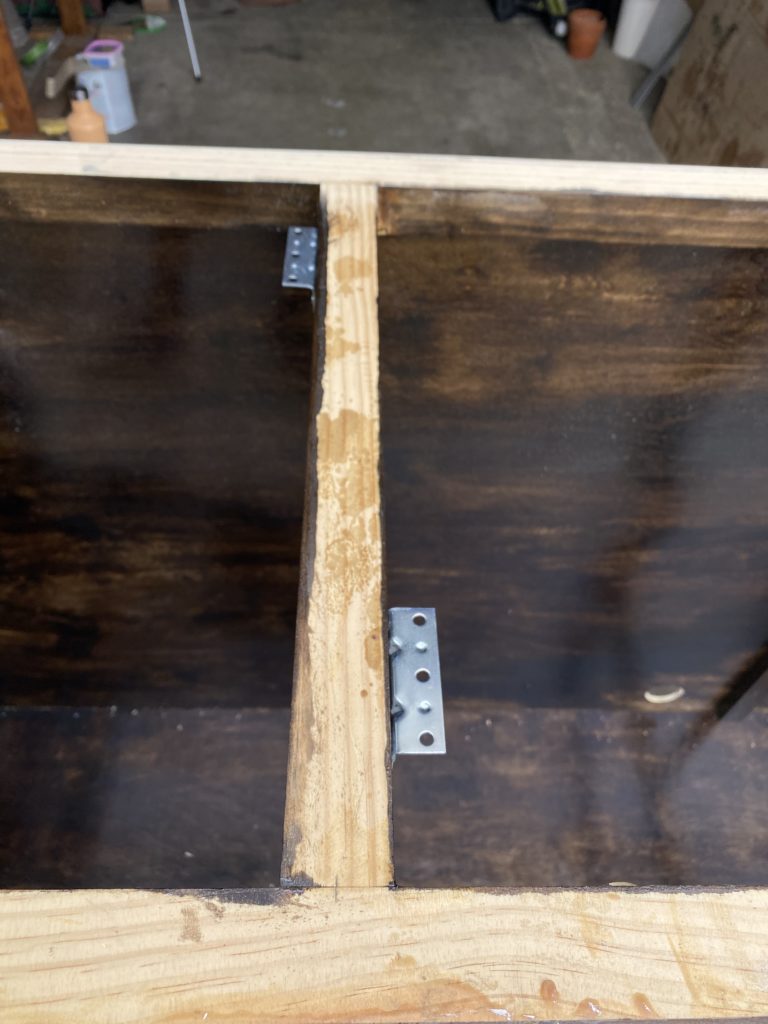
Step 15: Secure bar top to cabinet frame
Prep the top frame for the finished bar top by attaching the corner braces. We brought up the cabinet to the bar nook separately from the bar top to split up the weight. Once the bar top has been placed, secure the screws into the top and you’re done!
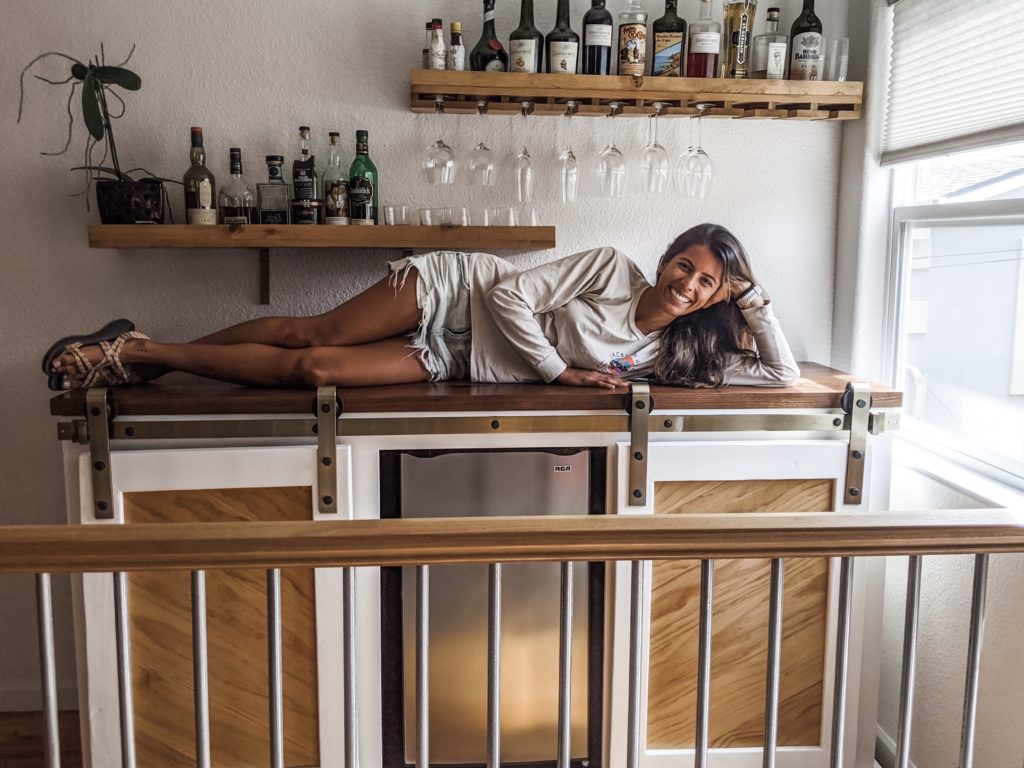
Step 16: Enjoy!
The joy I feel glancing over at our bar nook is unreal. It looks so much neater, I love how the colors come together in the space, and it’s especially gratifying seeing what was just a sketch a few months earlier come to life!
Here are a few things that I learned that really stuck with me:
It’s best to find the straightest common boards you can find. Boards like the select pine can get warped so be sure to add some time to check when buying materials. Not all of mine were straight, but I used the nail gun to secure items flush on certain parts of the cabinet, like the bottom trim. Places like the doors didn’t have that perk so you can tell they’re bent a teeny tiny bit if you really stare at it. Another way you can fix it is by planing both sides of the board.
It really does make a difference sanding in between coats. Whether it’s paint or stain, I found the finished result to look and feel much smoother than places where I didn’t sand between coats on a couple pieces on the cabinet interior that’d be seen less often.
When making cuts, especially on the miter saw, I found it best to over cut a little then trim down to the exact measurement. There were a couple of times I made a cut just barely too short. If I didn’t have the extra material and scraps to work with, it would’ve meant another Home Depot run!
I’m excited to share more project plans and welcome feedback on how I can make these better for you! Leave a comment below and I’ll be sure to answer your questions, too.
meet sarah
Welcome! I’m Sarah. I started this blog to be a resource for others around a few of my favorite things: living in Colombia, DIY projects, places traveled, and day-to-day life. My hope is that it can a place of inspiration and encouragement to help you plan the next project or adventure of your own!